

Most articles and tutorials out there are quite confusing for people who are new to the IT world — even for professional engineers focused on their own fields, like backend or frontend, who want their own domain and server but don’t know where to start.
First, before getting into the world of Domains and Servers, you need to understand a bit about networking basics. And you should know that a Domain in the IT context is the complete address of a site, whether offline or online — for example, the article you’re reading right now has the domain supanadit.web.id. As for the suffix on a Domain like .web.id? That’s not the domain — it’s the TLD. Many people misunderstand and think that .com, .net, .co.id, .id, etc. are domains, when in fact they are TLDs.
Most of you may also wonder why Domains cost money… actually they’re FREE, so why are there so many Domain service providers? It’s because behind every Domain there are servers and networks that must be maintained, along with the experts to run them — and on top of that there’s bureaucracy so everything can be connected to one another, regulated by ICANN.
For publishing an application, the most important thing is the Server — and in this case, every application definitely has different server requirements, especially regarding the operating system used. Servers aren’t always Linux, and not always Windows Server either; even plain Windows or a MacBook can be used as a server. But that discussion will be covered in a different article.
In theory you could create your own TLD simply, for example .ganteng, self-hosted on your own laptop / PC. But that’s going too far — let’s move on to the main discussion.
Purchasing the domain
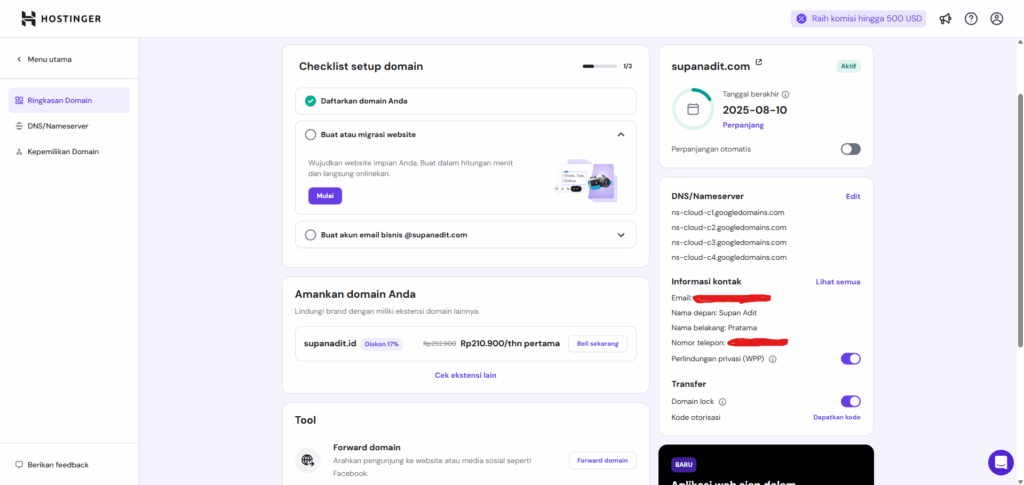
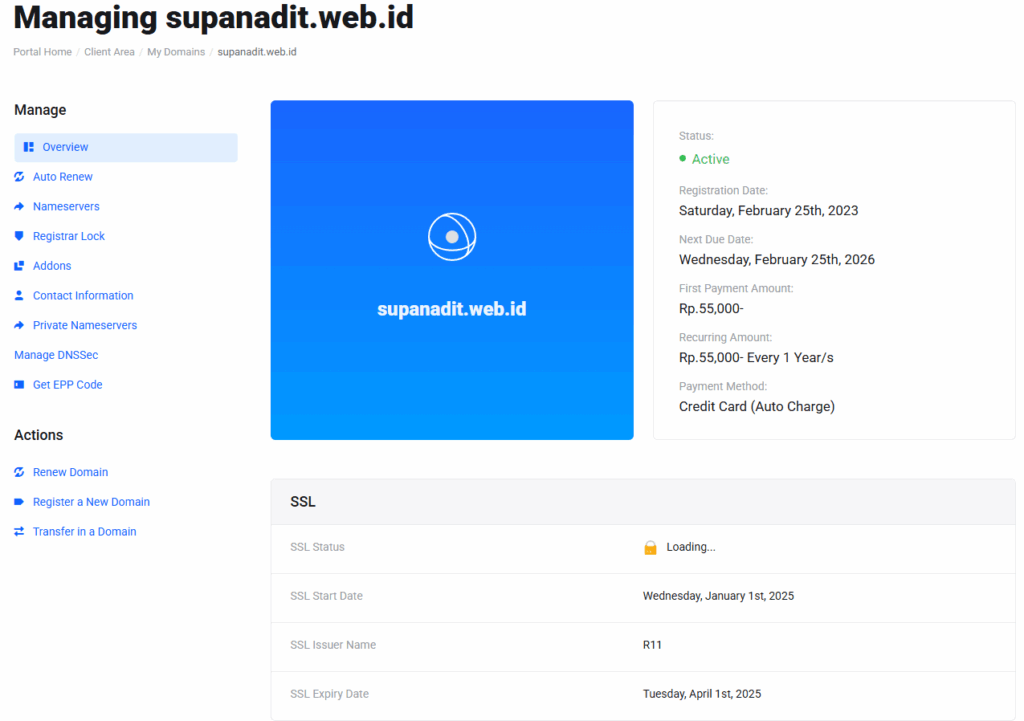
The very first thing when you want to build a site or application that many people can access is finding an address that matches what you want — usually by searching domain service providers like Hostinger, IDCloudHost, Namecheap, GoDaddy, and many more. Below are two screenshots where I bought domains from different providers — first at Hostinger and the second at IDCloudHost. (These examples are already purchased.)
Introducing DNS Manager
After you buy and own a Domain, the provider gives you a panel to manage it. Each provider has a different panel and different pages, but the functionality is the same. If you don’t even want to use the built-in panel of the domain provider, you can use a third-party panel — covered another time.
Back to the discussion — to manage a Domain, let’s open the panel. For IDCloudHost, here I’ll use the domain gusrandi.my.id, my younger sibling’s domain that I manage, and on IDCloudHost it looks like this.
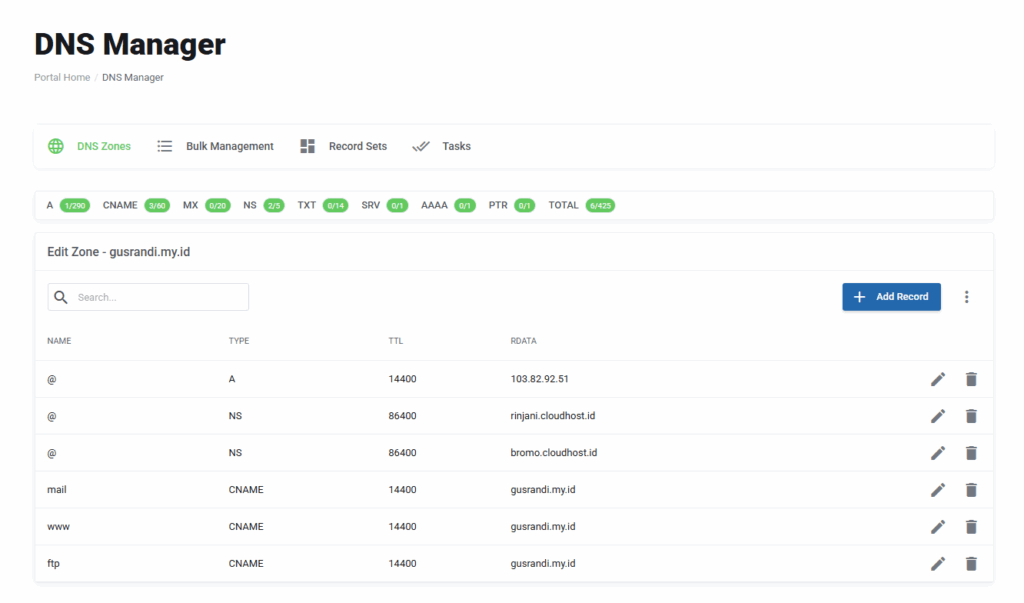
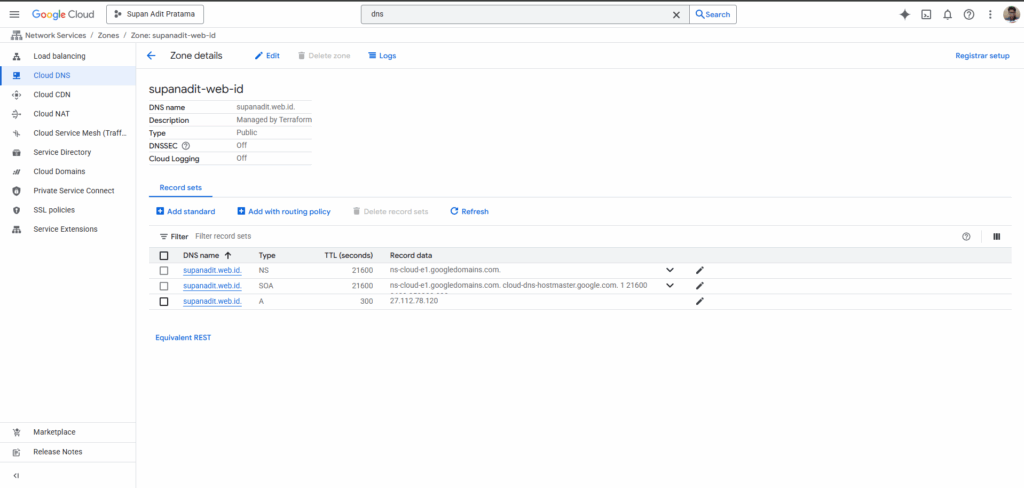
As explained before, every provider has a different look and menu, but they’re all roughly similar. For example, supanadit.web.id was bought at IDCloudHost but its panel is managed on Google Cloud Platform, as shown below.
Managing DNS
Here let’s integrate the DNS with a server we own. As an example, I have a server with the IP 27.112.78.120, where my sibling’s WordPress also lives on the same server I use.
Can you have many DNS records but a single server?
Of course — just play around with the reverse proxy and the DNS management.
Can you have many servers but a single DNS? (The reverse)
This is obviously possible too — just play with the panel.
As an example, the image below shows the configuration I applied.
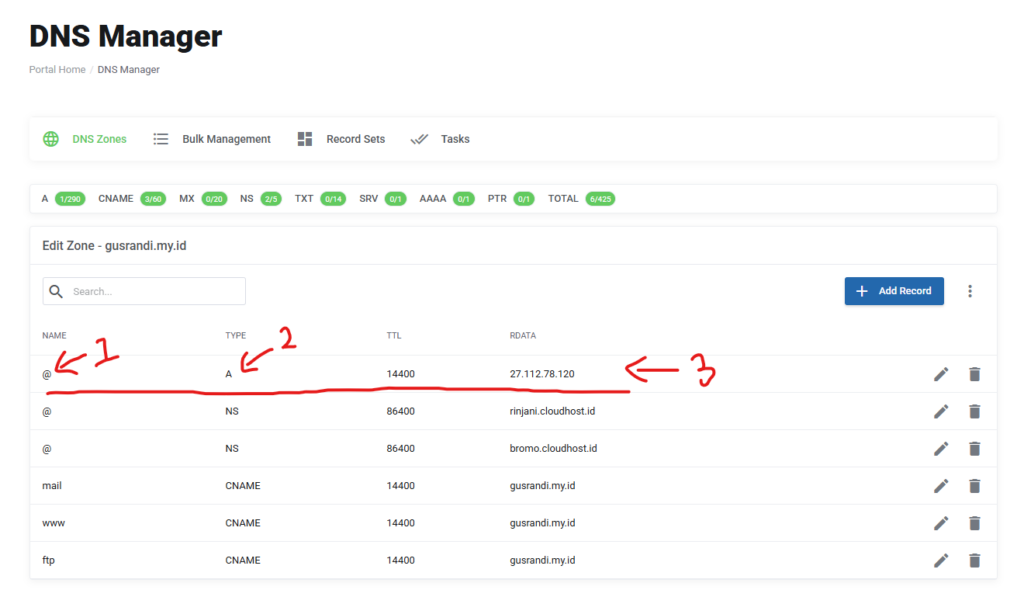
In the image above, I’ve added a few arrows with numbers.
No.1 = The domain name; the @ symbol indicates that row is the main domain, meaning gusrandi.my.id. If you replace the @ — for example with hello — it becomes a subdomain like this: hello.gusrandi.my.id
No.2 = The domain type. Type A points to a server over the IPv4 network; public IPs commonly use type A, or if you have IPv6 you can use AAAA. For email configuration you can use MX, and there are many more like CNAME, NS, PTR, TXT, SRV.
No.3 = The value based on its type: for A you fill in an IPv4 address, and for AAAA an IPv6 address of your server.
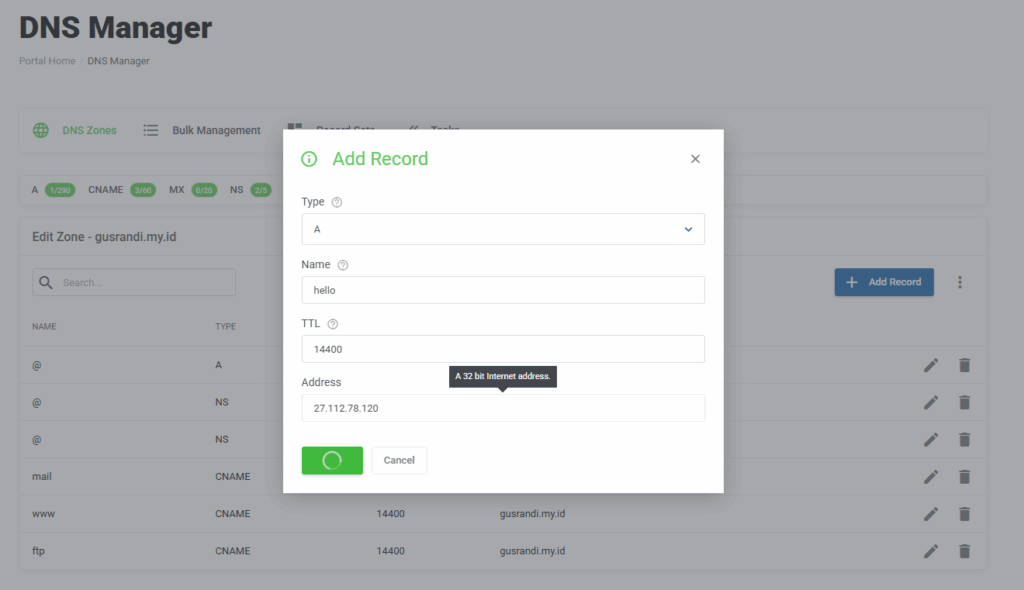
Here’s an example of creating a new subdomain with type A, as shown below.
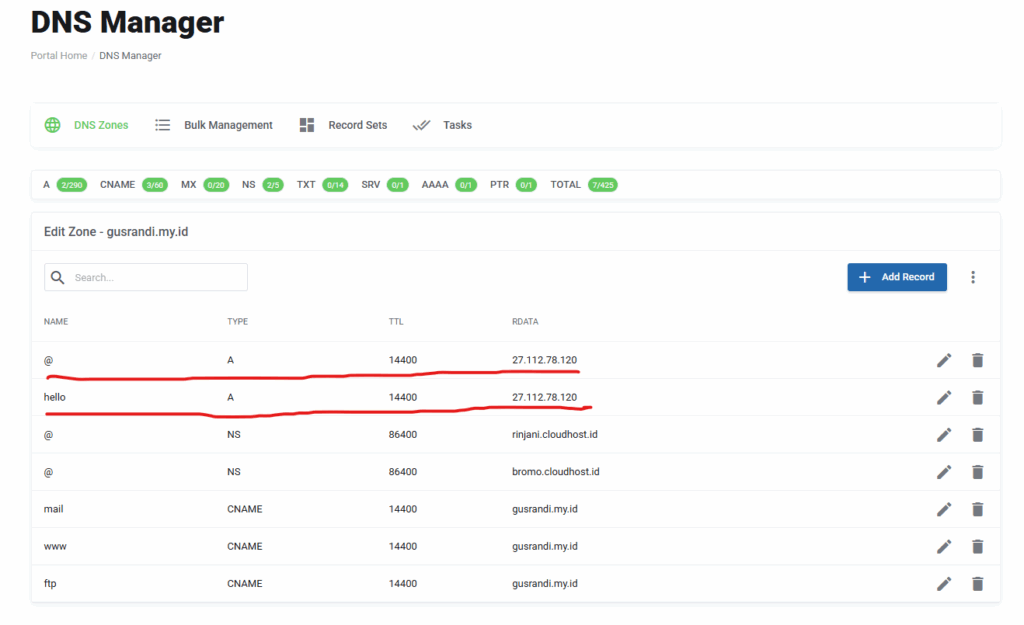
The result in the panel will then be added like the image below.
After that you have to wait around 1–30 minutes, depending on how fast your internet provider and the domain service propagate the change everywhere. Once you’ve waited, you can test it with a simple command in CMD / Terminal using the ping program, as shown below.
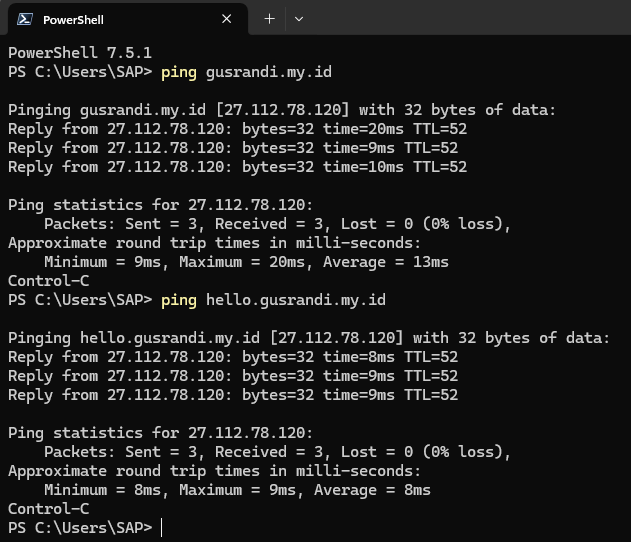
Once the result appears like in the image above — your IP showing up next to the DNS — the configuration has succeeded. Next up is preparing the server, the reverse proxy, and deploying your application. But if your IP hasn’t appeared yet, wait longer and try pinging again in a few minutes / hours. Please be patient…